Storing secrets in HashiCorp Vault service
This document describes how to use HashiCorp Vault to store sensitive information away from Ember configuration.
This guide was developed in 2020, reader is encouraged to refer to most recent documentation from https://www.vaultproject.io for up to date information about this project.
Minimalistic installation of Vault
In this section we will show how to install HashiCorp Vault service. These instructions are very brief, refer to Vault documentation for in-depth coverage of this material.
Please note that here we assume that secrets stored in HashiCorp Vault are easy to recover. For example, for each exchange Ember needs API keys for order entry. You can always re-generate API key using exchange account settings in the unlikely event that Vault storage fails. Hence we can simplify Vault installation and avoid things like high availability storage configuration. If you are planning to use Vault as a single repository of your other secrets you may be required to install Vault cluster for additional reliability.
Best Practices
For production installations follow recommendations outlined here.
Install Vault
We picked AWS t3.small instance running CentOS 7 to host Vault.
As an option you may consider using Terraform scripts to create Vault cluster. For simplicity here we follow the official Vault installation tutorial. Here we download version 1.1.3 for CentOS:
wget [https://releases.hashicorp.com/vault/1.1.3/vault_1.1.3_linux_amd64.zip](https://releases.hashicorp.com/vault/1.1.3/vault_1.1.3_linux_amd64.zip)

unzip vault_1.1.3_linux_amd64.zip

sudo chown root:root vault
sudo mv vault /usr/local/bin/
sudo mkdir --parents /etc/vault.d

vault --version
The last command is an installation check. It should display something like this:
Vault v1.1.3 ('9bc820f700f83a7c4bcab54c5323735a581b34eb')
Two more configuration commands:
sudo setcap cap_ipc_lock=+ep /usr/local/bin/vault
sudo useradd --system --home /etc/vault.d --shell /bin/false vault
Here we skip systemd service installation (refer to Vault tutorial).
Generate server certificate for Vault
Our Vault is running on AWS with internal DNS ip-10-0-0-65.us-east-2.compute.internal:
openssl req -nodes -newkey rsa:2048 -keyout vault-key.pem -out vault-cert.csr -subj "/C=US/ST=MA/L=Boston/O=Deltix/OU=DevOps/CN=**ip-10-0-0-65.us-east-2.compute.internal**"

openssl x509 -req -days 365 -in vault-cert.csr -signkey vault-key.pem -out vault-cert.pem
If necessary to add alternative name
openssl x509 -req -extfile <(printf "subjectAltName=DNS:ec2-18-206-209-55.compute-1.amazonaws.com") -days 365 -in vault-cert.csr -signkey vault-key.pem -out vault-cert.pem
Move certificates to Vault configuration directory and And hide private key:
sudo cp vault-* /etc/vault.d/
sudo chmod 600 /etc/vault.d/vault-key.pem
Configure Vault
Create configuration directory:
sudo touch /etc/vault.d/vault.hcl
sudo chown --recursive vault:vault /etc/vault.d
sudo chmod 640 /etc/vault.d/vault.hcl
Enter the following configuration into /etc/vault.d/vault.hcl:
backend "file" {
  path = "/etc/vault.d/vault-backend"
}

listener "tcp" {
 address = "0.0.0.0:8200"
 tls_cert_file = "/etc/vault.d/vault-cert.pem"
 tls_key_file  = "/etc/vault.d/vault-key.pem"
}

ui = true
api_addr="https://ip-10-0-0-65.us-east-2.compute.internal:8200"
Run Vault from command line:
sudo -u vault /usr/local/bin/vault server -config=/etc/vault.d/vault.hcl
==> Vault server configuration:
             Api Address: https://ip-10-0-0-65.us-east-2.compute.internal:8200
                     Cgo: disabled
         Cluster Address: https://ip-10-0-0-65.us-east-2.compute.internal:8201
              Listener 1: tcp (addr: "0.0.0.0:8200", cluster address: "0.0.0.0:8201", max_request_duration:...
               Log Level: info
                   Mlock: supported: true, enabled: true
                 Storage: file
                 Version: Vault v1.1.3
             Version Sha: 9bc820f700f83a7c4bcab54c5323735a581b34eb
==> Vault server started! Log data will stream in below:
For production environment run Vault as SystemD service. See Vault Documentation.
Initializing Vault
Change firewall to allow access to vault port 8200. In our case we edited AWS Security Group:

Make sure you add the IP address of the machine from which you will be accessing Vault web administrator GUI.
For actual production setups client’s IT should complete the next steps.
Open your browser to /ui web app on vault’s host and port: https://18.219.31.168:8200/ui/vault/init (your IP address will be different).
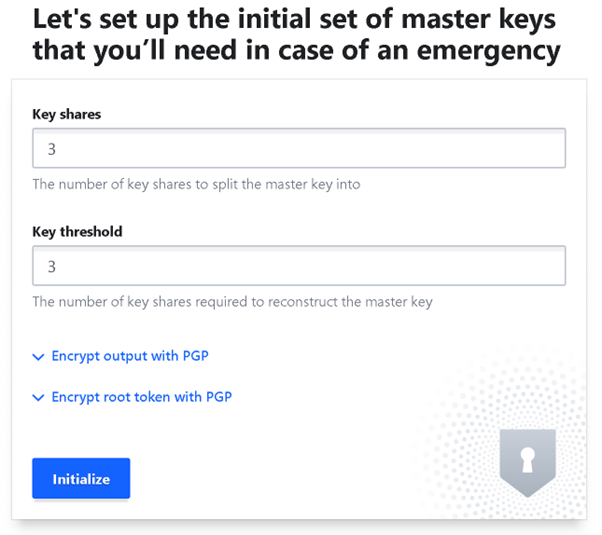
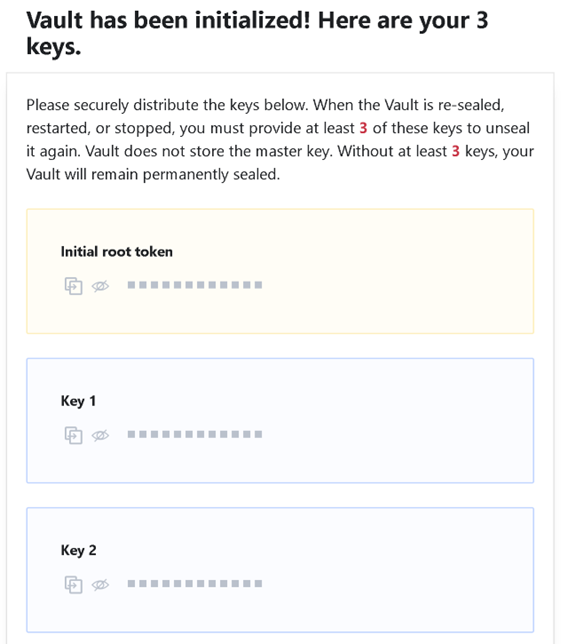
Enter the desired number of persons who will be required for all critical Vault operations and press Initialize button.
Remember these keys!!!**
Proceed to Unseal.
Each person needs to enter a personal key.
You may consider setting up auto-unsealing. See links at the end of this document.
Make sure each person gets a secure copy of the assigned key.
Populating Secrets database
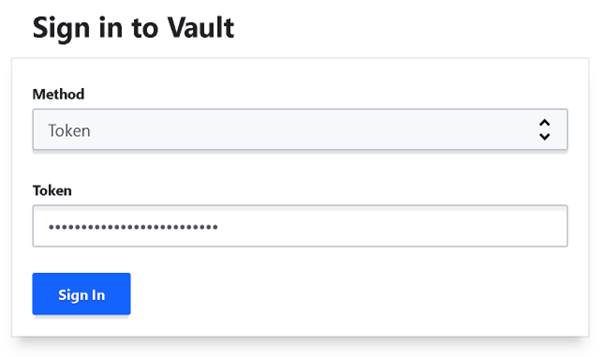
Login to Vault’s UI. Here we use https://18.220.52.7:8200/ui using root token:
Enable KV secrets engine. Specify version 2 and location for your secrets. Make sure to use a folder name here instead of a path, for instance “deltix”. The vault java driver that we are using cannot handle secret engines mounted at a path at this point.
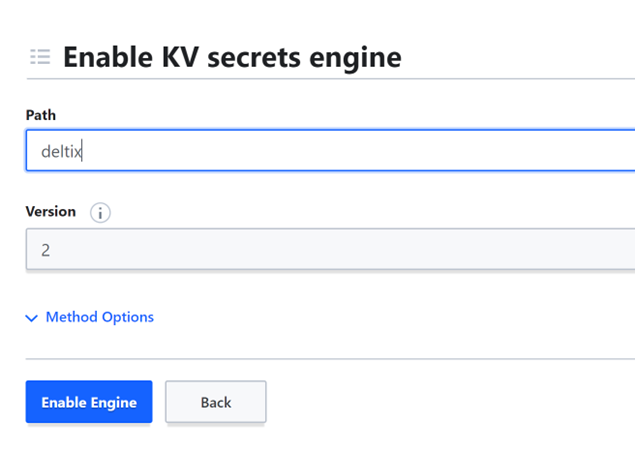
TODO: Extend max lease duration (Method Options)
Select the secrets engine we just created and add new secrets. You can use any name for each secret as long as it matches names referenced in you ember configuration.
Now let’s generate a new COINBASE API key to be stored as a secret in Vault.
Generating API key and storing it in Vault
Here we will illustrate API key configuration for COINBASE PRO, use similar process for other exchanges.
Go to User settings of your COINBASE PRO account and select “API” section. Create new API Key:
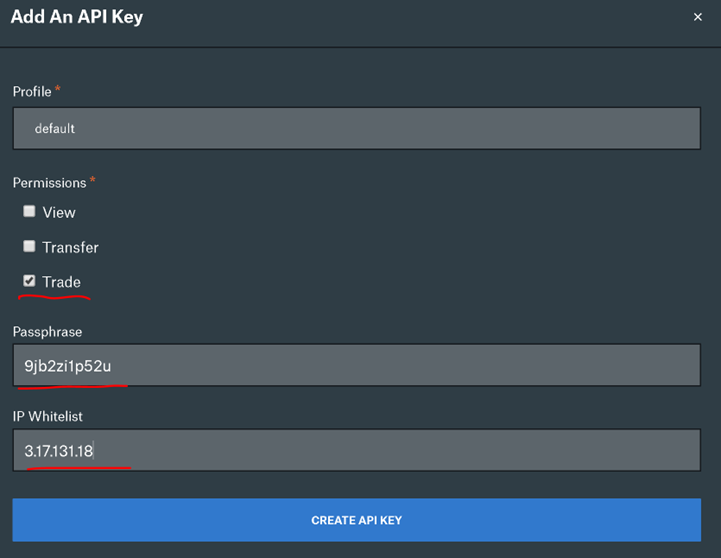
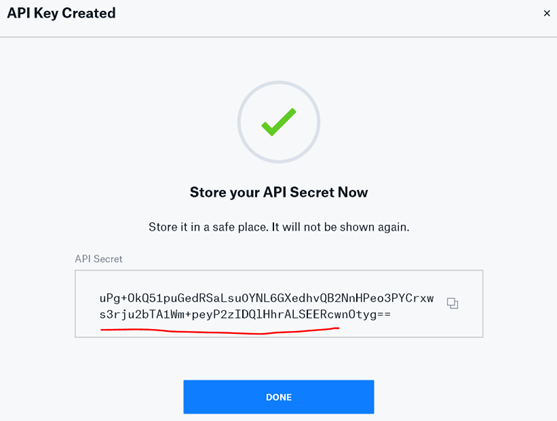
Whitelist to public IP address of Ember that will be accessing the exchange. Make sure to remember the passkey (will be used in the next step). Complete the API key creation process and remember the secret:
Storing Secrets into Vault
Now go back to Vault Web UI (Secrets tab) and click on “Create Secret” under the “deltix” engine we created a few two pages ago. Please note that inputs that we provide for secret “path” and each “key” can be arbitrary. You just need to be consistent in what you enter and use the same values in your ember configuration.
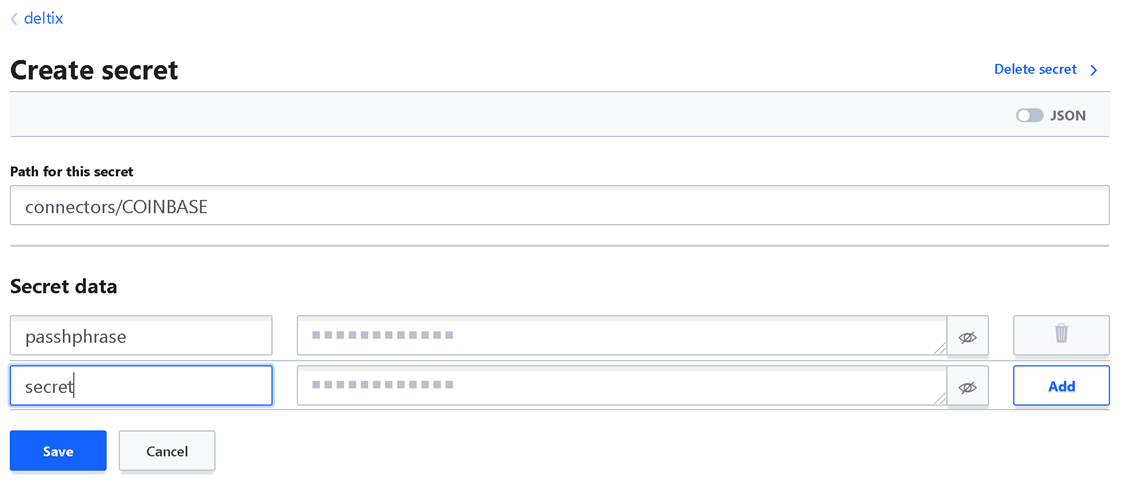
Enter passphrase and secret from API key we generated in COINBASE PRO account (previous section).
ACL Policy
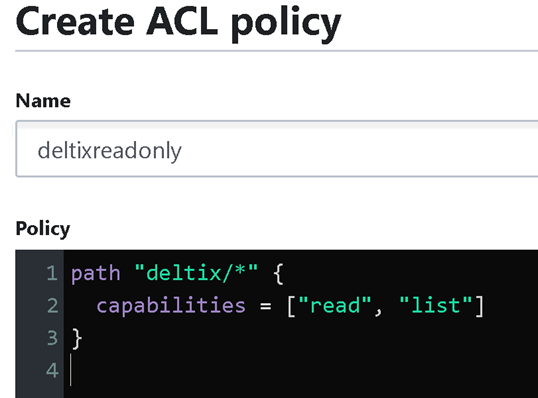
Let’s create a new policy that only allows to read secrets under secrets engine path. Go to Policies > Create ACL Policy menu item.
path "deltix/*" {
  capabilities = ["read", "list"]
}
 Save it.
Modify Max Lease TTL of the token Authentication Method. Click on “Access” tab at the top, and select “Auth Methods”, and then “Edit configuration” for the “token” authentication method:
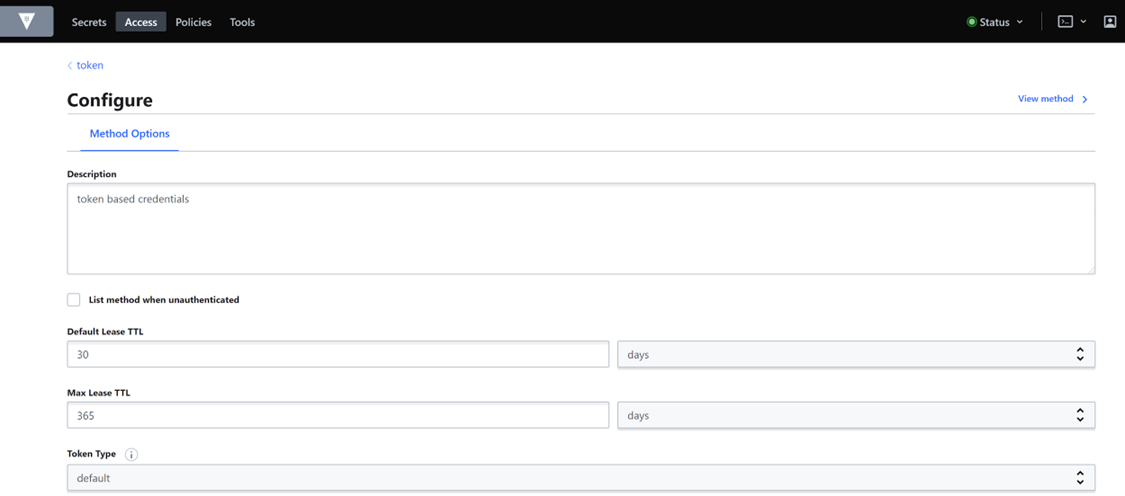
Specify 365 days for the Max Lease TTL option and then click “Update Options” button at the bottom.
Issue a new token that has permissions granted by read_secrets_policy. Do this on the vault server host using vault CLI. First set these environment variables to specify vault server address and public certificate:
export VAULT_ADDR=https://ip-10-0-0-65.us-east-2.compute.internal:8200
export VAULT_CACERT=/etc/vault.d/vault-cert.pem
Then login with your root token:
vault login
If login fails with something that resembles DNS error simply add local hostname resolution rule to /etc/hosts.
Issue new token associated with read_secrets_policy and 1 year lease period:
-> vault token create -policy=deltixreadonly -period=8760h
Key                  Value
---                  -----
token                s.9rrUjfG6ONHZkoCbLpzqOxRF
token_accessor       JkxL6oVmXtM65nm26PEwPgrO
token_duration       8760h
token_renewable      true
token_policies       ["default" "deltixreadonly"]
identity_policies    []
policies             ["default" "deltixreadonly"]
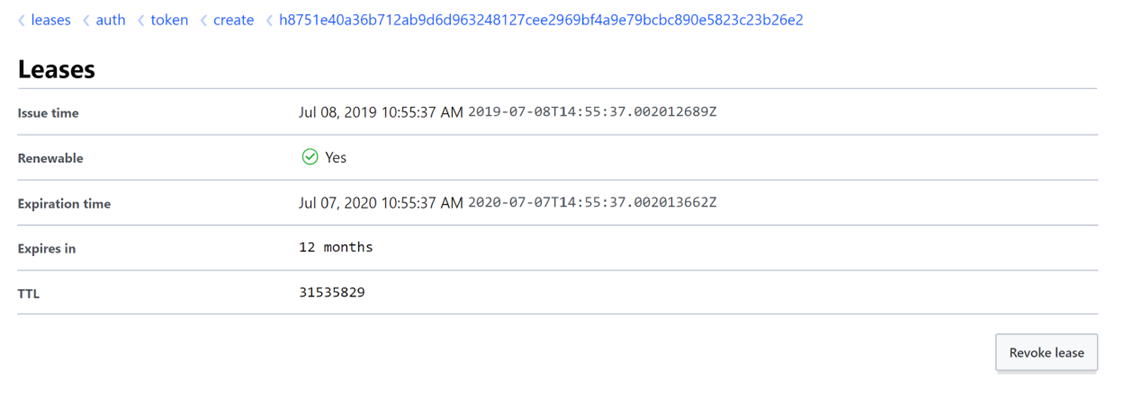
You can verify newly created token in Vault Web UI. It should appear under Access > Leases menu:
Configure Ember to use Vault
Specify generated token in ember.conf along with the vault server URI and its public certificate:
vault: {
   uri="https://ip-10-0-0-65.us-east-2.compute.internal:8200"
   token="EV47639e1cf4e9e0222f417eb83390bdde8165bc41ec8312d196f484d32a13a988"
   sslPemFile=/deltix/emberhome/vault-cert.pem
}
Note that access token is encrypted using Deltix mangle tool like this:
/deltix/ember/bin/mangle <clear_text_token>
or if you are running Ember under Docker:
/opt/deltix/ember/bin/mangle <clear_text_token>
Finally edit COINBASE connector to reference Vault secrets by path:
connectors {
  COINBASE : ${template.connector.fix.coinbase} {
    settings {
    host = localhost # stunnel
    port = 4198
    targetCompId = "Coinbase"

    senderCompId = "b259b5563840e5bfc103eebb9e90294d"
    secret = "vault:/deltix/connectors/COINBASE/secret"
    password = "vault:/deltix/connectors/COINBASE/passphrase"
    attributeKey = gdax

    resetSeqNums = true
    enableDropCopy = false
    cancelOrdersOnDisconnect = Y
    selfTradePrevention = CANCEL_NEWEST
    }
  }
}
Good reading on subject
Appendix: Java API to access configuration secrets stored in Vault
deltix-ember-config module contains the following utility classes that can be used for reading secrets stored in Vault:
Method deltix.ember.util.ConfigUtil
ConfigUtil provides static methods for reading config values and is also used to create and populate beans with attributes in ember.conf. It will read bean attributes annotated with @Hashed from Vault when the value in config is in the form of Vault URI or try to decrypt the value otherwise. ConfigUtil.init(Config) method should be called once before ConfigUtil is used for reading beans in order to initialize it with the Vault configuration.
The getSecret(Config, String) method allows you to read secrets specified in config at specific key.
Here are the declarations of main methods involved with handling secrets:
public class ConfigUtil {
   public static void init(Config config);
   public String getSecret(Config config, String key);
   public <T> T createBean(final Config config, final Class<T> clazz);
   ….
}
Method deltix.ember.util.SecretsStore
SecretsStore utility reads secrets from HashiCorp Vault configured in config specified above.
getSecrets(String path)will return a Map of secrets at specified path in the VaultgetSecret(String secretURI)will parse secretURI in this formvault:/<secret-path>/<secret-key>and return secret stored in Vault at specified secret-path and secret-key.
Here are the declarations of these methods:
public class SecretsStore {
     public SecretsStore(Config config);
     public String getSecret(String secretURI);
     public Map<String,String> getSecrets(String path);
}